Tuesday 31 March 2009

Just What I Always Wanted - Really!

For some CRAZY reason, I have always wanted an antique, claw foot tub. Most of the people I've told about this think I am NUTS! And I may be, but I have waited and waited and now I have one.

When we decided to remodel the "guest" bathroom, which will usually be used by me, I decided that I was going to find one come hell or high water! Yesterday I was searching on Craig'slist, one of my favorite junking sites, and found this beauty:

It was just what I wanted. It was a reasonable price and the interior is in great shape, it doesn't need to be re-glazed. That alone saves me major $$! I have priced some refurbished ones in some of my local shops and they were running $700 or more, just for the tub. Then I'd have to buy the faucets and all to go with it. So I've already saved more than $400!

Just a quick cleaning with some baking soda and a good polish with some paste wax for cars and the inside will be ready to go. The outside, on the other hand, will have to be stripped and repainted, but DH has promised to help me with it. I've found instructions on several websites and think it is a pretty straight forward process, but it will take more than one weekend to complete. The claw feet will also have to be stripped and either painted or plated. I'm probably opting for painting them. There are lots of good quality metallic spray paints that I can try. If they don't work or last, I can always have them plated.

The bonus, all of the hardware - faucets, etc. were included - even the overhead frame for the shower curtain!

As my kids say - I'M STOKED!

Monday 23 March 2009

Hello Spring

We have lived in our current home for almost 7 years. Just off of the main street to our home is an abandoned business. Sometime in the past someone had the creative idea to plant daffodils so that everyone who passes can enjoy the hope of the upcoming season. As sometimes happens, flower bulbs either die off or become too deep set to bloom again. This is what has happened with this Spring message, but we still enjoy watching for it's message. I hope you enjoy it too!


Friday 13 March 2009

Toile Tuesday

Pretty Organized Palace is hosting Toile Tuesday today. Here is my contribution to the party.

This is one of my grand-daughter's room. When my daughter was expecting her, my then 77 year old mother, my daughter and I had a Baby Room Workshop and put together these items for her room.

The valance for her window. No pattern. We just winged it.


Her diaper stacker. We used a pattern, but I couldn't find it in time to post it. The pattern didn't show the red trim that we put at the opening, but we thought it really added a little zing to the look.


We combined the toile, with black & white dots, a solid red and a solid white to make this Rail Fence quilt for her crib. Daughter uses a solid red crib sheet to pull out the red in the quilt.


Then we purchased these letters to spell out the baby's name and painted them to match. Her Daddy nailed the moulding "frame" to the wall above her crib and daughter put the baby's name inside. We used a pencil eraser dipped in white paint to add the dots and hot glued ribbon between the colors for a smoother transition. I've since found toile scrapbook paper and have thought about replacing the black & white dots with it, but I have so many other projects to do, it may not happen.

We found a nice curvy dresser on Craig'slist and painted it red. It is just the right height to use as a changing table.

And here is another toile project I've done recently.

Remember the book ends I was doing for my co-workers office?

Here is the before:

And the after:

It's amazing what a little black spray paint, some scrapbook paper and Mod Podge can do!

Wasn't this fun?!?! Now I'm off to find more things to do with toile. Don't forget to jump on over to Pretty Organized Palace and check out what all of the other crafty ladies have done.

"Guest" Bathroom Remodel Is Underway

We have been slowly getting back into our ever-on-going remodel. It was really hard to get too motivated during the winter months, but now that the weather is starting to warm up we are at it again. And yes, these are actually "during" pictures. You already know the story on the "befores".

This bathroom is only 9 ft. wide and about 11 feet long. Within the bathroom is the closet where our washer and dryer are located. When we were looking for a new house I told the realtor that I wanted my new house to have either a separate laundry room or a bathroom with the washer and dryer in it. In our previous house the closet for the washer and dryer was in the kitchen/dining room. I don't know who had that brilliant idea, but it didn't work for me. Nothing like dryer lint in the kitchen and piles of laundry on the dining room table!
So, I got my wish and the closet for the washer and dryer is in the "guest" bathroom.
Also located in this closet is the hot water heater. This means that on the end of the closet where the hot water heater is there was about 18" of space between the wall and the hot water heater. So, because I didn't have a linen closet (I was using a pine cupboard that was taking up a LOT of room) I had the idea to build one. So, while DH was not paying attention, I got his trusty "saws all" and went to work.

First I checked to make sure there were no pipes or electrical wiring running through the wall. Then I knocked a hole in the wall and cut out the drywall.


The I pulled out the stud in the middle of the opening.


Then DH came in and saw what I was doing and asked me "What in the he double hockey sticks" I was doing NOW! OK, maybe he didn't say double hockey sticks, but I'm trying to keep this a "family" blog.

So, as he knew would happen, he had to get involved. He framed in the top of the opening that you see above and we went to Lowe's . . . where I told the guy in the kitchen department what I was doing and he became a great enabler. I told him I wanted 2 cabinets 12" deep. One to put on the top and one to put on the bottom. He explained that only upper cabinets are 12" deep, so he dug through the cabinets they had on the shelf and found me 2 "damaged" cabinets and marked them down to half price. (See, I told you he was a GOOD enabler!) The actual "damage" consisted of black marks on the doors of the oak front cabinets that he said rendered them unusable for someone who wanted to stain them. Well, I was going to paint them, so no problem. And home we went with 2 oak front upper cabinets for less than $100.


I am using beaded board in this bathroom, so we took the back off of the upper cabinet and removed the door. We cut a piece of beaded board that was left over from the bedroom we did for our granddaughters and added it to the back of the cabinet. He took the door to the garage and cut out the center panel. We are going to put glass in it instead. Then we installed the cabinets in the opening, one above the other. There is 17" of space between them, which we filled in with another piece of beaded board. We will add a "counter top" to the top of the bottom shelf and I will add some decorative touches.


It will all be painted white and trim will be added around the opening to complete the installation. I'll post those pictures when that part is done.


DH got busy yesterday and did this:


And pulled this away from the wall:


Two happy Freecycler's are coming to claim them tonight. I know, I know, I could have re-purposed the vanity, but sometimes it's best just to move something on to someone else.

A re-purposed dresser will become the new vanity and I'm looking for a great deal on an old one of these to replace the tub:


Come back in a few days and check out how much we get done.

Monday 9 March 2009

Results of My Weekend Junking

The weather here in Middle TN was pretty good this weekend. It was warm, but breezy and overcast. However, it was still good weather for getting out and about.

This is what I found on the side of the road. I had seen it laying there for a couple of days, but thought someone would get to it before I did. It was in a bad location, traffic wise, so I was hesitant. But, I finally decided to pull in one of the side streets, park and run around the fence that is between the sub-division and the off ramp at Rosa Parks Blvd., which is where it was. People must have thought I was NUTS! But I got it.

As you can see, one side of the table is not usable. But the other side is. It just so happens that this is one of those tables that you can open up to add an extension, so I just took the two sides apart, saved the good one and trashed the bad. I have plans. Also, the apron from the bad side survived. I'll have to figure out something for it as well.

On Friday night I went to a consignment sale where my daughter was working. It was the Encores and More North sale that I mentioned a few posts ago. Along with the great deal I got on a whole summer wardrobe for my son's daughter, I got this cool metal planter for $4.

I also found this old ironstone bowl at a nearby yard sale for $3. It was filthy and smelled of cigarette smoke, as did everything at that yard sale! A little Efferdent and water and it cleaned right up.
And last, but not least - the FREE twin size bed I got from a wonderful lady on Freecycle.org. My daughter is going to see if she can clean it up to use for her 3 year old daughter. If she doesn't use it, I will paint it up and use it myself.


What good deals did you find?

Friday 6 March 2009

I WON!

Teresa over at Cherry Checkers just notified me that I won an awesome, just for me gift from her just by posting a comment and taking a challenge. Actually, the posting a comment part was a problem - I was having computer problems, so I shot her an email to let her know I was up for the challenge. And she chose me as one of the winners!

She took the challenge from Malisa at Moonlight Hollow! who took the challenge from Laurie at 2Chippys who took the challenge from, well, you get the idea. Go check out their blogs. Talk about some crafty ladies!

Now I will pass the challenge on to three of you!

The first 3 people that respond to this post will get something made by me, it will be my choice, but made especially for you.

*However...this offer does have some restrictions and limitations (the fine print!!)

****What I create will be just for you.
****You will receive this item before the end of the year (or sooner).
****You will have no idea of what the item is going to be or when you will receive it.
****The catch is that you have to repost this "MEME" and put together something to be sent out as 3 surprises of your own.***

This should be fun.
I guess I'd better get busy getting creative!

Thursday 5 March 2009

Our Master Bedroom - The Tour

Still no "before" pictures, so I thought I'd post the "afters" of our master bedroom. This and the master bathroom were the 2nd and 3rd rooms that we have redone so far. The first was the room we fixed up for our only (so far) grandson. For some reason I don't have pictures of it on my computer. I'll have to remedy that soon too. He really likes it too! Pictures soon, I promise!
Anyway, back to the Master Bedroom.
When we first moved into this house, this room was considered one of the guest rooms. Our house is 1600 square feet with 3 bedrooms, 2 bathrooms, a l... o... n... g narrow entry/living room (den) combo, a kitchen and a dining room. As I said before, there are only 2 of us, so the other 2 bedrooms are the "guest" bedrooms. However, because the original Master Bedroom was located on the back of the house, away from the beautiful view of the small lake that we have on our property, we decided to make this "guest room" the master bedroom.
When we started, there were 2 very small windows in the room. By small, I mean they were only about 24" wide and 36" tall. Besides not letting in much light, you had to duck down or sit in a chair to see out. Really strange! Most of the windows in the house were like that. Some still are, but they are destined for a change. One window was located on the front of the house, facing the lake and the other was on the adjoining wall facing the side of the property. In addition, there was a clothes closet on the right hand wall as you came into the room, right at the doorway. This meant that as you entered the room you had to make a quick left or you'd run into the closet's side wall. This is also the wall that was between the master bathroom and this bedroom. So here is what we did.
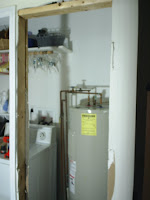
We tore out the clothes closet, cut in a doorway and installed a pocket door leading into the new master bathroom that is in the previous post.

We are installing pocket doors in all of the interior doorways to avoid wasted wall space where a regular door would swing open. DH has become quite the door installer! In fact, he has installed 4 so far.
So, as you come down the hall from the rest of the house this is what you see.

This wardrobe was built by Great-Great Grandfather. My Grandmother had it in her barn when we found it. It was a mess. But my sweet Father took it completely apart and put it back together and refinished it. That was in the 1980's. I have moved it with me every where I go. At one time it held a small TV and my doll collection. Now it holds my quilts and blankets and misc. clothing. It is my most favorite piece.

The first picture of the doorway into the bathroom shows a smidge of this wardrobe on the left. The little square picture on the left is one of my granddaughters. The large picture on the right is a print I've had for years, one of my husband's favorites. It wasn't my first choice for that spot, but it was his.

As you swing around to the left you will see our bed. It belonged to my husband's Grandmother. It needs some wooden side rails and other repairs. Again, I would like to use something different, or paint it, but that probably won't happen. Or it might, just depends on how convincing I can be. The little black shelf at the bedside holds our clock-radio and my husband's favorite picture of me. There was a small round table there, but it got in the way of DH's dresser drawers. The window that looked out on the side yard was just about where the top of the head board is now.

As you swing around to the left wall, you will see these great French doors that DH and my son-in-law put in where the other window was.

DH got out his trusty chain saw (see picture in right column of blog) and started cutting the big 'ole hole. That was AFTER we took out the window and checked for any electrical lines. The French doors didn't come in when they were supposed to so we went 3 weeks with nothing but plastic taped over the hole. Thank heavens we live in the country! DH calls these the French Window because we haven't built the deck/porch yet and if you step through the doors you'll step down about 4 feet!

This is DH's dresser.It matches the bed. I love it, but I have issues with it AND the bed.

And on the wall at the foot of the bed is this electric fireplace that we got at Lowe's for 1/2 off. It was too short so DH built a small brick hearth to put it on and raise it to regular mantle height. That's the foot board of the bed that you see in the foreground of the picture. You can tell the room is not very big.

When we close the bedroom door, this keeps the room nice and cozy. It even looks almost like a real fireplace.

Here is another view. The tri-fold screen is waiting to be filled with lots of pictures. I've got to dig them out of the box they've been in FOREVER!

So that's the tour.

Yes, the room needs more stuff on the walls and MORE COLOR! I love the wall treatment, it looks like old leather, which I'll tell you about in my next post, but the furniture blends in too much. I am not happy with it, but don't want to paint the wall. Solution: DO SOMETHING WITH THE FURNITURE AND ACCESSORIES.

If you've got suggestions, PLEASE THROW THEM MY WAY!

Monday 2 March 2009

Check out V & Co. - Giveaway

Go check out Vanessa's awesome blog, V & Co. She has some great ideas, cute stuff at her Etsy store and is having a great giveaway.
And did I mention, she is one talented lady?!?